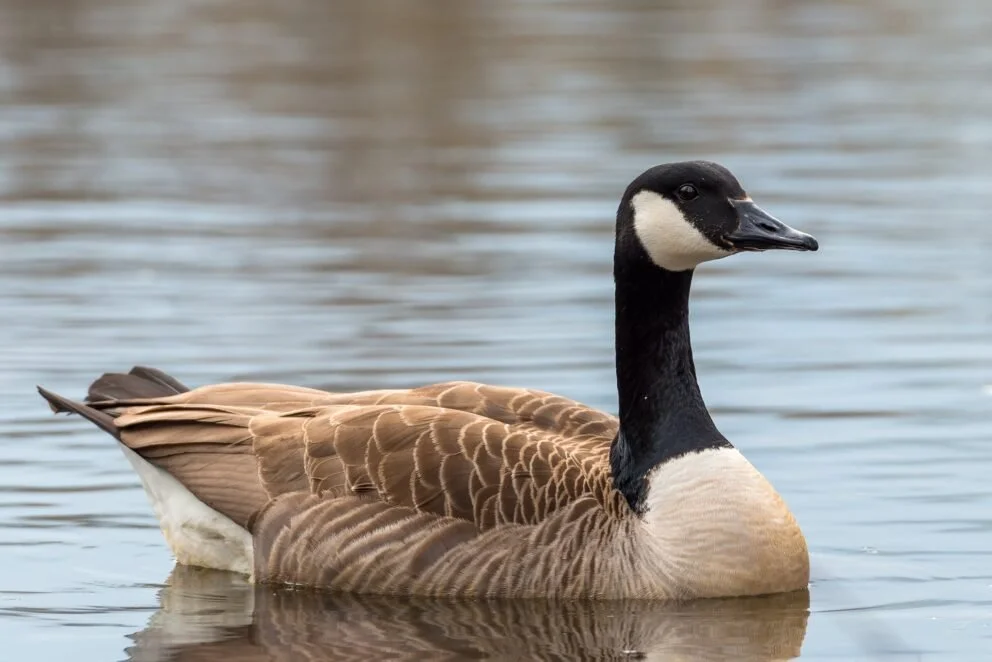
Painting Your Concrete Porch Goose
A Step-by-Step Guide
So, you've adopted your first porch goose? Now what?! If you've recently acquired an unpainted concrete goose and you'd like to give it some color - this step-by-step guide is for you!
Often, goose lovers assume that because a statue is concrete it is virtually indestructible. However, over time, exposure to the elements can cause concrete geese to fade, chip, become discolored, or even begin to crumble. Treating your goose right from the beginning will help to ensure it's with you for years to come! You can even add custom details to ensure your unique goose stands out from the crowd. Below you'll find a comprehensive guide on how to give a good first coat of paint and a fresh start.
Step One: Gather Supplies
Before you begin the painting process, gather the following materials:
1.) Premium Exterior Acrylic Paint
This is the most important supply a goose painter needs to acquire! There are so many paint brand options out there - and frequent goose painters all have their favorites! Going for the cheapest available brand might seem attractive, but quality paints are made to last. They will keep their color better and offer more protection in the long run. Consider getting sample sizes and/or sharing the paint and the cost with another feathered friend so you can get the best quality available to you. This is not an ad, but my go to brand is Behr Premium Plus Exterior for its ease of use and UV protection. Whatever brand you choose the paint should have the following features:
Exterior
100% Acrylic (Water-Based)
UV protection
I prefer a satin or eggshell finish - but flat or semi-gloss are fine options as well! Determine how shiny you want your goose to be when finished and choose accordingly.
Here are the suggested colors/sizes depending on your painting technique:
Traditional Light/White Basecoat:
1 Quart White
8 Ounce Yellow/Orange
8 Ounce Sage/Light Green
8 Ounce Dark/Forest Green
Antiqued Dark Base Coat
8 Ounce Black, Dark Grey, or Charcoal
1 Quart White
8 Ounce Yellow/Orange
8 Ounce Green
Other combinations - pink, purple, glitter, the colors of your favorite sports team - let your heart go wild!
2.) Paintbrushes (various sizes, from large to fine detail)
3.) Acylic Paint Markers (optional)
Paint markers make the detail work on the eyes, nostrils and nails SO much easier! You can go high end with a brand like Posco or head to Amazon and pick up some Art Soul markers (my favorite) for fairly cheap. You'll want at least one black marker and one for your eye color of choice blue, green, and brown/bronze tend to be the most popular.
4.) Clear outdoor sealant (for protection)
5.) Sandpaper and/or metal files
6.) Portland Cement or Concrete Filler/Patching Compound (if needed)
7.) Water to dilute the paint and for clean up.
8.) Drop cloth, cardboard, or old newspaper (to protect your workspace)
Step Two: Prepare your Goose
You most likely got your goose from a concrete yard where it was poured and then sat outside to cure while it waited to be chosen for it's forever home! A bit of prep work is required before your goose will be ready for its first coat of paint. The steps will vary depending on what kind of shape your goose is in, so assess your personal goose and then complete the steps below as required.
1.) Clean the Surface:
Begin by giving your goose a good bath. Use a damp cloth or sponge to remove dirt, dust, and debris. This step is crucial for ensuring the paint adheres well.
2.) Inspect for Imperfections:
Check your goose for any chips or holes. Concrete making is a complicated process that can be affected by humidity, temperature, timing, and mixing elements.
Air bubbles are one of the most common causes of imperfections in a concrete goose and can be easily patched with a little bit of Portland cement or concrete filler/patching compound. Allow the patch to dry thoroughly (at least 24 hours) before painting.
3.) Sand or File the Surface:
Another common imperfection in a concrete goose is a rough patch or raised seam. Lightly sand or use a metal file to smooth rough areas or raised seams. After sanding or filing clean the statue again before moving on to the base coat.
Note: These steps apply to small or minor imperfections only. Large cracks, breaks, major holes, decapitation, missing beaks etc. require more major reconstruction and will be discussed in future articles.
Personally, I do not recommend that a novice goose owner or painter buy a goose that requires major repairs. A broken concrete statue is going to be much more susceptible to future breakage or crumbling and set you up for frustration or future heartache.
If a broken goose is your only concrete option and you're not sentimentally attached (your grandmother owned it, etc.) you may want to consider holding off and getting a plastic goose until you can find a better option that will stand the test of time.
Step Three: Apply a base coat.
Are you ready for your first big decision? Do you want your goose to have a dark or a white base coat?
A dark base coat gives the goose a more rustic or antique look whereas a light or white base coat will result in a brighter goose.
There is no wrong answer here, it's up to you and how you want your goose to look. And remember, if you change your mind, it's just paint and you can always start over! Whichever color base coat you choose - follow the steps below to get a great base coat that will offer the first line of protection for your concrete goose.
1.) Dilute your paint.
It's important that you water your exterior acylic based paint down so that has the best chance to absorb into the statue. The more it absorbs the better the paint will adhere which will prevent future chips and cracks.
2.) (Optional) Wet your statue.
Using a hose, wet paint brush, or wet cloth, wet the statue thoroughly before applying the paint. Some goose painters believe this will help the paint absorb better while some believe if the paint is diluted this step can be skipped. This is especially recommended if you are completing a dark base coat.
3.) Apply one thin coat of diluted paint.
Let dry completely. Repeat at least two more times or until you are completely satisfied with the coverage results. Let your base coat dry completely before continuing to the next step.
Step Four: Adding Color
Once your base coat is completely dry you can begin to add your colors. Here are the steps for each technique:
Light/White Base Coat
1.) Add yellow/orange to the beak and feet.
If your paint is very thick you may want to dilute it slightly but use your best judgement. Apply at least 2 - 3 coats letting each coat dry completely in between. Be careful painting the beak because the orange is difficult (but not impossible) to cover with white if you make a mistake. However, you can be a little messier with the feet because the green grass color will easily cover the yellow/orange.
2.) Color your grass light green.
Most goose statues have a grassy area on the base around the feet. Begin to color this area around the feet with a light green color. One coat is usually enough, even if a little of the orange peeks through. Let dry completely before continuing.
3.) Topcoat the grassy area with the darker green color.
You can use a dry brush, applying just a little and then quickly and lightly painting dark on light for a more mottled grassy look or wet brush for a more diluted look. Apply additional coats until you achieve your desired results.
Check out the following video to see this technique done step by step.
Porch Goose Paint-A-Long with The Goose and The Gander
Dark Base Coat
A dark base coat will require a dry brushing technique that lets the base coat show through, creating a rustic or antique look. To create this look, follow the steps below:
1.) Dab a small amount of white paint to a dry, stiff brush.
Quickly and lightly sweep the brush over the goose body. Using these quick/light strokes will apply paint to the raised areas and highlight details. Let dry completely.
2.) Repeat this technique for each color.
Orange for feet and beak, green for grass, etc. Use small brushes for the more detailed areas.
Check out the video below to watch this technique in action!
Step Five: Finishing Touches
1.) Toenails and Eyeballs:
Using acrylic paint pens or small detail brushes apply black paint to the goose's toe nails (claws). Complete the eyeballs by applying a circle of of the color of your choice, a smaller circle of black for a pupil, and finally a tiny circle of white as a highlight.
2.) Complete a Final Inspection:
Do a thorough check for any areas that may need additional paint or touch-ups.
3.) Seal Your Work:
Once the paint is dry, be sure to apply a clear outdoor sealant before exposing your goose to the elements. This step will protect your goose and make sure the paint lasts longer and remains vibrant.
Step Six: Caring for Your Painted Geese
To prolong the life of your painted porch goose, clean it periodically with mild soap and water. Avoid harsh chemicals that could damage the paint. If you live in a cold climate, consider bringing it inside during the winter so it doesn't have to endure harsh temperature changes.
You may also want to consider touching up the paint and resealing your goose about once a year. At the very least, each time you change your goose's outfit give it a thorough look over to make sure no cracks, chips, or breaks have developed overtime.
Remember! Concrete geese are strong, but not indestructible and they need proper care to make sure they last.
Conclusion
While some people prefer to purchase their goose already painted and sealed (a perfectly valid choice!), for others, painting a concrete porch goose is a fun project that they will undertake with joy!
Either way, painting a goose can increase the lifespan of your statue and make it stand out on your porch or in your yard. With some planning and creativity, you can give your goose a great start and its best chance at a long life. Enjoy the process and take pride in your beautiful, newly painted porch companions!
Guide created by Porch Goose Club of America member Joanna Bentley, a talented writer and editor!


